Sherrys Stampin' Room

Thursday, August 2, 2012

My First Paper Players Challenge Entry

I had a bit of fun doing a PAPER PLAYERS Challenge.
Here is the card I made for the entry.
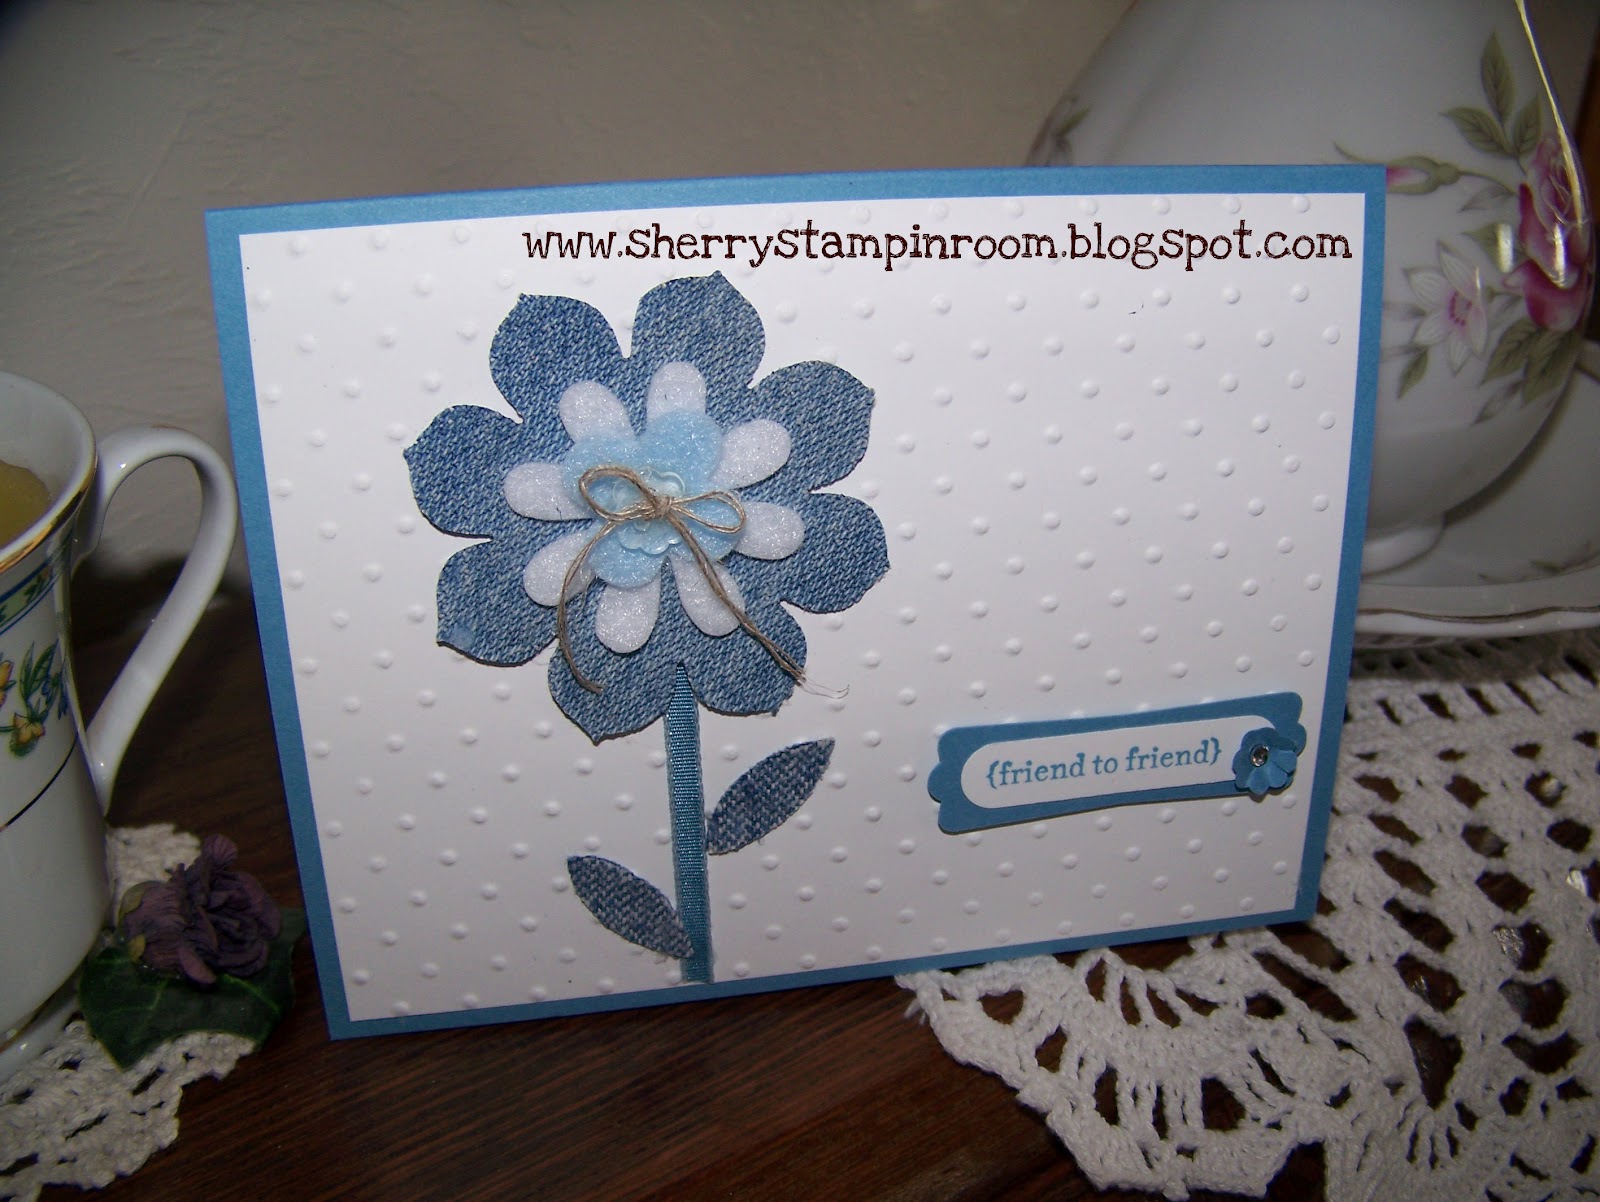
This was the challenge....a fun Tic Tac Toe!
Try one of the challenges! You might have fun!
If you are interested in how I did my flower, contact me.
Thanks for your visit!

Monday, July 30, 2012

Cocoa, Anyone?


I SPY NEW STUFF!!!
Tomorrow, August 1, the Stampin' Up! Holiday Catalog goes live!!!
Better strap on the chair seat belt when you see it!
{a.w.e.s.o.m.e}
---Wouldn't you love to join my Stampin' Up! team?---
---What are you waiting for?? You are missing out on LOTSA fun!!---
---Click the link at the top of my page to JOIN NOW---
Thanks for your visit!

Sunday, July 29, 2012

More 2012 CONVENTION project pictures

It sure doesn't take long to hit CUTE overload at Convention!
Or, any Stampin' Up! event!


I will be inviting anyone interested in joining my Stampin' Up! team for a FANTASTIC SPOOKTACULAR Promotion, starting August 1.
I want to add EIGHT new demonstrators to my group!
Will you consider being one of them??
-------
$99 Start Up Kit
30% discount on first order, guaranteed 20% discount after that (or more--just ask me!)
$100 monthly or $300 quarterly 'minimum' sales
Enjoy Stampin' Up! as a fun hobby or business
All of your purchases, travels, etc are TAX DEDUCTIBLE
Stampin' Up! offers a full line of COLOR-COORDINATED items!
No more 'can't match' stuff to sit in your craft room!!!
You have access to Stampin' Up!s AWESOME Demo Only website, with over 250,000 samples
---be thinkin'---
Thanks for your visit!

Friday, July 27, 2012

A Grand 80th Party!


My mom recently turned 80 years old!
My brothers and I decided to celebrate! My mom and dad ran the El Taco, a precursor to Taco Bell, for 20 years, and people still come up to them and tell them how much the would LOVE some of that El Taco Green Chile!  We made 2 roasters full of the stuff and figured we fed about 50 friends and family, until 2 a.m.!!
See the cute pinwheels and banner on the cake?
And, pinwheels on the card basket. We also had huge pinwheels made of 12 x 12 Designers Series Paper in plants outside.
Here's a pin I made for her to wear. Now, I will attach it to the front of a little mini album for her, with all the birthday pictures in it.
The Polka Dot Paper is available in my online webstore.
Polka Dot Parade Designer Series Paper Item #126902 Price: $10.95
12 sheets: 2 ea. of 6 12" x 12" double-sided designs in 6 colors.
Daffodil Delight, Marina Mist, Old Olive, Pumpkin Pie, Real Red, Rich Razzleberry, Whisper White.
Remember! If you order $50 worth of merchandise, you can order the REASON TO SMILE stamp set for just $5! Awesome deal! This only lasts until July 31, though, so hurry!


I hope you like my projects!
Thanks for your visit!

Wednesday, July 25, 2012

Keep Calm and Carry On is AVAILABLE!!!


Carry On Hostess Stamp Set Available Again


July 23, 2012

On June 14, the discovery of legal issues with the Carry On Hostess Stamp Set (126645, 126647, and 128156) resulted in our turning the set off. Our legal department has since reviewed these issues, and starting today this set is available for ordering again. This is a HOSTESS FREE Stamp set. Ask me about having a PRIVATE CLASS for you and your friends! You can get this set and more for FREE!

Thanks for your visit!

Tuesday, July 24, 2012

Home from my first Stampin' Up! Convention!


I was ONE of 3422 attendees! WOWser!!! What a blast!
Stampin' Up! sure knows how to hold a party! LOL
What a well organized, jam-packed, educational 4 days!
Jennifer, and her downline-her mom, and I flew to Salt Lake City Tuesday, July 17th, and came home Sunday, the 22. We had Tuesday afternoon, and the better part of Wednesday to do a little sight seeing and to network with many other demonstrators. I was blown away at all the CUTE things I saw! The talent of paper crafters is out of this world!
Over the next few posts, I will let you see some of the pictures I took while I was there.
I truly wish you would consider joining Stampin' Up! This company is such a well run company that really treats the demonstrators great! Check out my WEBSITE to see how YOU can join my team. It's only $99 and you get a product discount of 20-40%, PLUS a ton of perks!

I {heart} Stampin' Up!
Thanks for your visit!

Wednesday, June 27, 2012

Punch Idea

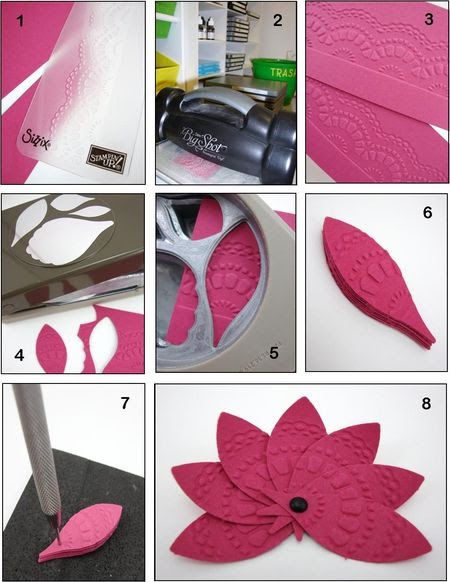
Check out this great idea for the Blossoms Petal XL Punch!

This would make an awesome PEACOCK tail, too!
If you don’t have these items yet, just think how versatile they could be in your crafting!
You can order the Blossoms Petal Punch and a matching stamp set on my webstore site!

Blossom Petals Xl Punch
Price: $16.95 Item #121808
Give your projects a touch of life-like nature using our Blossoms Petal Punch to build blooms from these shapely punched petals. You can create a flower image that looks like you just carefully cut it from your garden by layering petals and leaves and using Stampin’ Dimensionals to make them appear to pop off the paper. Coordinates beautifully with the Build a Blossom Set.
Build A Blossom - Clear-Mount Stamp
Price: $18.95 Item #121994
Imagine abundant layers of luxurious petals gracing the covers of cards and pages of your scrapbooks. Our Build a Blossom Set is jam packed with delicate petal and leaf shapes, some solid and others patterned for life-like looking detail. You can make much more than flowers with THIS punch!
Set Quantity: 12

Be sure to check out the CLEARANCE RACK while you are at my website! There are currently 10 other punchs available....but, hurry! Things are selling fast!
Thanks for your visit!

Saturday, May 19, 2012

Pink Dress Card

WOWSER! It was so windy here yesterday, with gusts well over 50MPH---that is one thing I DON'T like about living in Round Valley! We have had up 105MPH winds, and, have even been a question on Jeopardy, for naming one of the WINDIEST towns in the USA! Yep! We got wind, that's for sure, and, brother....the locals are a bit uneasy with all the winds.... Last year it was windy just like this, and, when the Wallow Fire started Memorial Day weekend.....well, let's just leave it at THE LARGEST WILDFIRE IN ARIZONA.....ugh! As I talk to locals here and there....it's interesting to know that I am NOT THE ONLY one that still has belongings that are not put up yet....I have a HUGE fabric Tupperware tote with all of my photos in it,,,ready to grab, if necessary. Going through something so traumatic as the fire and weeklong evacuation doesn't leave you fast.....
Anyway.....isn't this card the cutest??? I found this on STAMPIN CONNECTION....a website for Stampin' Up! Demonstrators only, with over 234,000 samples from demonstrators all over.
I needed some birthday cards, and this fit the bill perfectly! I want to make more to put into my card stash. I hate it when I--the card lady--don't have the 'right' card for a specific occasion. How sad is that?!?

This was the first time that I tried inking up my embossing folder first, before running the paper through the BIG SHOT with the embossing folder. I {love} my BIG SHOT and the VINTAGE WALLPAPER embossing folder!
I will leave you with one more photo for the day.

I {LOVE} to hang clothes on my clothesline!!! Last Sunday, was the first day for my line drying!
Hanging clothes on the line is so relaxing to me...weird, I know. I just love being a domesticated housewife, I guess! LOL Sad to think that line drying clothes is sort of a lost art....
How do YOU dry your clothes? Please leave me a comment.....I'd love to know!
And, if you have any questions about my card, you can email me.
Have a GREAT Saturday!
Thanks for your visit!

Saturday, May 5, 2012

Pink Framed Art

I made this for the 'little house' (my crafting space--see the picture at the bottom of the right hand column). I had found some 'Melon Mambo' bathroom towels and rugs at Walmart awhile back and the lightbulb turned on! LOL I have seen so many CUTE framed art projects that I wanted to make one, too. I have a downline gal making me a fabric companion piece for the bathroom, also.
This will be included in the Little House bathroom decor. If you have questions, just contact me.
My squares are 2" x 2", and I put it in a 12 x 12 scrapbook frame.
I am tickled 'pink' with it! LOL

Thanks to my downline, Jennifer, for her help...it helps to have a second set of eyes!
Hope you have a great Saturday evening!
Thanks for your visit!

Saturday, April 28, 2012

Check this out!!!

It's that time of year! Stampin' Up! is retiring alot of its product line, to make room for MORE goodness!
I am soooooo excited!!! Both for the retiring sale and the new products! Not all products are at a reduced price, but, if you have had your eye on any of these items, now is the time to shop!
Click the picture to go to my webstore to see all the retiring products. You can order right there, and your order will come directly to your door! Just like magic! LOL

Thanks for your visit!

Wednesday, April 25, 2012

HUNGER GAMES!!!

My downline, Jennifer and I went to see HUNGER GAMES yesterday! AWESOME!!! She got me all 3 books for my birthday...

...as well as made me this FANTASTIC memo board!!

Can you say SPOILED??? *wink*
We both read the first book of the series, and decided we HAD to see the movie! She won FREE TICKETS for the movie matinee the day before we went! WOOHOO!!!
So, I figured I needed something for her. I scanned the internet for some HUNGER GAMES graphics and here is what I gave her as we waited for the movie to start....
The card...
Inside of card:
Everything on front was popped up with dimensionals.
I also gave her a CD, in a decorated to match, coverup.
We had a great day and didn't get home until almost dark!
Hope you get to do something fun, wherever YOU are!
Leave me a comment on what FUN THING you did today!
Thanks for your visit!

Tuesday, April 24, 2012

Fun FOLD Card tips!


Q: I’ve seen some cards with fancy folds made using the Labels Framelits. How do you do that?

A: The new Hearts and Labels Framelits Dies for the Big Shot have been a huge hit! There are so many great ways to use them, besides the obvious layered frames. You can use them to cut edges of cards into shapes, make window cards, make cards with fancy folds, and so much more! One of my favorite fancy folds cards is a Z-Fold card. It’s extra fun because of a cut with the Label Framelits that makes the main image flip to the inside when you open the card!

Here’s how you can make this fun Z-Fold Flip card:

Step 1: Cut a piece of 8-1/2” card stock in half to get a 5-1/2” x 8-1/2” card body. Score at 4-1/4” along the 8-1/2” side to create the folded card. Next, fold the front of the card in half. You can do this by folding the edge of the card back towards the fold of the card or by scoring first at 2-1/8” and then folding the edge of the card back towards the fold of the card.


Step 2: Turn the Multipurpose Platform to Tab 2 and place it onto the Big Shot with a Cutting Pad on it. Unfold the card body you previously scored. Place a Label Framelits (the 3rd largest works well) centered over the fold on the card front. Place the top Cutting Pad only over half of the Label Framelit so the Cutting Pad edge is lined up with the fold line on the center of the card front. Carefully hold the sandwich in place and run through the Big Shot. Only the part of the Framelit with the Cutting Pad over it will be cut.

Step 3: Fold the card and decorate the Framelits section with other Framelits layers and stamped images. When the card is opened, the image flips to the inside of the card. Use Texture Impressions Embossing Folders to add embossing to cut Framelits for even more detail and interest!

Have fun experimenting with this great Z-Fold Flip card using the Framelits Hearts Collection, too!

THIS ITEM IS IN THE OCCASIONS MINI THAT ENDS APRIL 30!! Order yours today!!!!
CLICK HERE to go to my webstore to order yours!

Thanks for your visit!

Monday, April 23, 2012

Stampin’ Up! will be announcing the retiring accessories list this week...be watching for that. Those items will GO FAST, so, if you want anything from the list I send you, be prepared to order online at my WEBSTORE FAST!!


We only have several days left to order from the OCCASIONS MINI. Get your favorites before they are GONE, GONE!


DID YOU KNOW???

You can use the Bird Punch, #117191 , to punch out the cup handle on the large cup from the TEA SHOPPE stamp set, #125547 ? Use the wing part. Cool, huh?


TOOL TIP: Punching Vellum
Trying to insert vellum into a punch that has a lot of detail can be exasperating! Here is a simple trick that will make it so easy for you!

Supplies:
Stamp Set: #125537 Mixed Bunch
Cardstock: #101856 Card Stock Vellum (20 shts), #100730 Whisper White card stock
Ink: #101731 White Craft Pad
Accessories: #125603 Blossom Punch, #109132 White Embossing Powder, #100005 Heat Tool

Directions:

1. Insert a piece of card stock into the Blossom Punch (about 3 1/2"x 4 1/4")
2. Ink the stamp image with white craft ink and stamp it onto the card stock vellum.
4 Add white embossing powder, and emboss.
5. Slide the embossed vellum into the punch over the white card stock.
6. Pull out the white card stock & punch the vellum piece.

TECHNIQUE: Lined Envelopes

An envelope is the first thing the recipient of your handmade card sees. Besides stamping on the envelope, have you ever thought about jazzing up your envelopes by lining the inside with Designer Series Paper? Here's an easy techniques that will add just a little more of that special touch.

Supplies Used for this Project:

PAPER: Medium Whisper White Envelope #107301
Berry Blossoms Designer Series Paper #122350
MISC: 2-Way Glue Pen #100425, Paper Snips #103579, Designer Sanding
Blocks #124304

Directions:

1. Cut a 5-11/16" x 4" piece of Berry Blossoms Designer Series Paper. I tried 5-3/4" and 5-5/8" and neither one of those worked as well.
2. Using a 2-Way Glue Pen, add some glue to the inside edge of the envelope flap.
3. Carefully slide the piece of the Berry Blossoms Designer Sereis Paper into the envelope, just enough to cover up the edge. It doesn't need to go all the way down the inside of the envelope. Make sure you have a little overlap on the flap.

4. When the glue dries trim off the excess on the flap. If you don't trim it perfectly, you can take a Designer Sanding Block to finish off the edge.

These are so easy and fast, make a bunch and you'll have them ready to go.

Thanks for your visit!

Wednesday, April 11, 2012

Isn't this a CUTE card!?

Here's a fun, cheerful card! This is made with some of the NEW Summer Smooches product line! You can order these items, as a sneak peek in April. They will be in the NEW 2012-2013 Catalog, when it comes out June 1. Click :HERE: for more details on this sweet card. You can also view LOTS of other projects while you are there. And, don't forget to check out the CLEARANCE RACK, with lots of new items recently added.
Thanks for your visit!
Related Posts with Thumbnails