Sherrys Stampin' Room: tutorial
Showing posts with label tutorial. Show all posts

Thursday, August 1, 2013

FRAMELIT 3-D Cards!!


How fun is this!?!
Don't have a BIG SHOT yet? Let me show you how you can get it FREE or at a reduced price!
I use my BIG SHOT every day that I craft!
I ♥ my BIG SHOT!!!

Thanks for your visit! I hope you become a Follower of my blog! And, don't forget to sign up for my posts to come directly into your inbox. There is a spot on the top right to add your email.
Have you ever thought about joining my Team and becoming a Stampin' Up! Demonstrator? You can TRY IT for 6 months, for only $99--AND, you get to choose your 'kit' items!! CLICK THE JOIN LINK at the top of this page, for more information, or contact me!
Order ONLINE 24/7

Monday, July 22, 2013

I'm home from convention....

Whew!!! Got home from the 25th Anniversary celebration for Stampin' Up! Convention last night. I will try to put up some photos soon! In the meantime, check out this AWESOME video below, showing how to use embossing folders!

You can order any of these products at my webstore!
www.sherrystampinroom.stampinup.net Click SHOP NOW on the top right, and, don't forget to check out the clearance rack!
AND, REMEMBER....if you order 3 packs of Designer Series Paper, you'll get to pick one for FREE!!!
 Thanks for your visit! I hope you become a Follower of my blog! And, don't forget to sign up for my posts to come directly into your inbox. There is a spot on the top right to add your email.
Order ONLINE 24/7

Tuesday, July 9, 2013

Have some fun with Stampin' UP! markers!


Thanks for your visit! I hope you become a Follower of my blog! And, don't forget to sign up for my posts to come directly into your inbox. There is a spot on the top right to add your email.
Order ONLINE 24/7

Wednesday, June 19, 2013

Cute lil bag!!

See how easy it is to craft?? Join my Stampin' Up! team for lots more fun ideas!

Click the picture above, to watch a fun video showing how to make this sweet little bag. How sweet is this!?
Thanks for your visit! I hope you become a Follower of my blog! And, don't forget to sign up for my posts to come directly into your inbox. There is a spot on the top right to add your email.
Order ONLINE 24/7

Monday, June 17, 2013

Distressed Masculine Card VIDEO Tutorial

I tried to upload this video a week ago and it wouldn't go through...ugh. I'm learning, though! *Ü* Hope you enjoy the video and maybe pick up a few tips.

***If the video doesn't show up, you can view it on my YOUTUBE CHANNEL***
Thanks for your visit! I hope you become a Follower of my blog! And, don't forget to sign up for my posts to come directly into your inbox. There is a spot on the top right to add your email.
Order ONLINE 24/7

Saturday, April 20, 2013

POM POM Fun, Part 4

Here's another FUN POM POM idea!!
How quick and easy are these!
Oh, and, CHEERFUL!!!
Need punches, paper or kraft boxes?
You can order them at my website! Click below!
Thanks for your visit! I hope you become a Follower of my blog!
Order ONLINE 24/7

Thursday, April 18, 2013

POM POM Fun, Part 2

Oh, what FUN!!!
Isn't this happy looking??
These are soooo stinkin' simple to make!
Bet you can't make just one!!
Thanks for your visit! I hope you become a Follower of my blog!
Order ONLINE 24/7

Wednesday, April 17, 2013

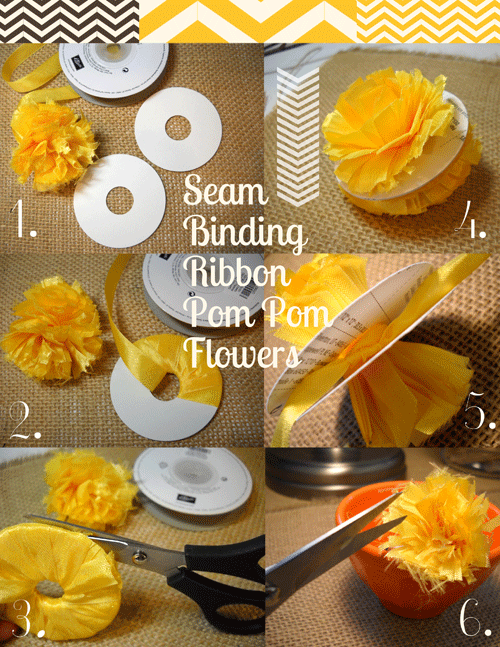
How about some POM POM fun!!

Aren't these CUTE!?
You can run a needle and thread through them and make a banner.
Or, add them on as a package embellishment.
Thanks for your visit! I hope you become a Follower of my blog!
Order ONLINE 24/7

Monday, April 15, 2013

How to Make a Greeting Card

One of my newest Stampin' Up! Downline Demonstrators *Hi, Kathy* was having issues figuring out the measurements for cardmaking. Here's a VERY quick video. I hope it helps you learn the basics of cardmaking.
Thanks for your visit! I hope you become a Follower of my blog!
Order ONLINE 24/7

Thursday, October 11, 2012

HOLIDAY ORNAMENT TUTORIAL

Stampin' Up! Holiday Ornament - Q&A

 
Q: I love the ornament featured on the front of the Holiday catalog.
How do I make it?
A: That ornament is all the rage in the stampin’ world! This month, you can receive the Festive Paper-Piercing Pack with our Christmas Gift Promotion.

You’ll be surprised that you can create such a beautiful ornament from paper. It takes a bit of time, but is actually pretty simple to do. And it makes a great gift.

Here’s how!

SUPPLIES:
• Ornament Keepsake stamp set (#128048 wood, #128051 clear)
• Holiday Ornaments Framelits Dies (#127816)
• Big Shot (#113439)
• Cherry Cobbler Classic Ink Pad (#126966)
• Old Olive Classic Ink Pad (#126953)
• Very Vanilla card stock (#101650)
• Simply Scored Scoring Tool (#122334)
• 1-3/8” Circle Punch (#119860)
• 3-1/2” Scalloped Tulle Ribbon (#127841)
• Multipurpose Liquid Glue (#110755)
• Vintage Faceted Designer Buttons (#127555)
• Large Pearl Basic Jewels (#125577)
• Linen Thread (#104199)
• 1/8” Taffeta Ribbon or other ribbon for hanging ornament
• Rosette Die (#125594)
• Candlelight Christmas Designer Series Paper (#126901)
• Silicone Craft Sheet (#127853)
• Bone Folder (#102300)
• Hot Glue Gun and Glue
Step 1: Stamp 20 of the larger ornament images on Very Vanilla
card stock with Old Olive ink. Cut out with the coordinating Holiday Ornaments Framelits Die using the Big Shot. Stamp 20 of the small ornament images on Very Vanilla card stock with Cherry Cobbler ink. Cut out with the coordinating Holiday Ornaments Framelits Die using
the Big Shot. Score 15 of each ornament in half from top to
bottom using the Simply Scored Scoring Tool.
Fold in half along the score line.

Step 2: Use the Multipurpose Liquid Glue to adhere three of the
scored ornaments together. Adhere one half of the first ornament
lined up with one half of the next ornament and then do the same
with the third ornament. Leave one half of the first and last
ornaments un-glued. Repeat the steps until you have created
5 sets of the 3-ornament groupings in each ornament style. Add Multipurpose Liquid Glue to the halves of the first and last
ornaments in the 3-ornament grouping. Adhere to the back of
an un-scored ornament of the same style. Repeat for all 5 sets of
each style.

Step 3: Punch a circle from scrap card stock using the 1-3/8” Circle Punch. Place the circle on the Silicone Craft Sheet. Add a line of
hot glue around the edge of the circle. Position the necks of the
larger Old Olive ornaments, flat side down, evenly around the circle. Press into the hot glue. Use the Bone Folder to avoid burning
yourself. Nest the smaller ornaments with the larger ornaments.

To finish up, add Tulle Ribbon and linen thread, and create a rosette
to add to the center of the ornament with the clear button using
hot glue. Punch a hole for ribbon at the top.
Optional: Add Dazzling Details Stampin’ Glitter or
Champaign Shimmer Mist to add sparkle to the finished ornament.
I hope you make some of these! Once you make one, you will
be inspired to do different things with them.
Christmas is right around the corner!

If you are local, and would like to have a PRIVATE PARTY with your friends, we could make them at that time! Call me for more details!
You can also ::order any of these items on my WEBSITE::

 ~~Make Something That Means Something~~
Thanks for your visit!

Friday, October 5, 2012

Origami Ornament Tutorial VIDEO

I have another tutorial for you!
I saw these cute ornaments, and HAD to make some!
Enjoy! I hope you make some cute ones!
Please let me know, if you do!

**Double Click the video, and, it should open up larger for you**
Here's a few pictures of the projects I showed you in the video.
 
 
Thanks for your visit!

Tuesday, October 2, 2012

Sunflower Card Tutorial

I made a video showing how to make a cute sunflower card.
I hope you like it, and, that it inspires you to make a few sunflowers, too!

And, here's a few pictures of the completed card.
 

Thanks for your visit!

Monday, October 1, 2012

Mini Sunflower Tutorial

Lookie what I found for you today!
A mini Sunflower tutorial!
Thanks for Linda for sharing this!
You can order any of these items,
see the list below, on my webstore site:
www.sherrystampinroom.stampinup.net
HERE'S HOW:
1) Punch two flowers with the Boho Blossoms Punch.
2) Punch one center with the 1/2" Circle Punch.
3) On one flower, snip between each petal with the Paper Snips.
4) Place a Stampin' Dimensional on top of the first flower.
5) Place the snipped flower on top of the plain flower.
6) Add the center.
7) Bend every other petal upward.
8) Add green foliage. Little Leaves Sizzlit used here.
SUPPLIES & ACCESSORIES:
Summer Starfruit Card Stock #126839
Old Olive Card Stock #100702
Early Espresso Core'dinations Card Stock #127848
Boho Blossoms Punch #119858
Paper Snips #103579
1/2" Circle Punch #119869
Little Leaves Sizzlit #114511
Stampin' Dimensionals #104430
 
Sunflowers are definitely showing their faces around here!


Thanks for your visit!
Related Posts with Thumbnails